Posts

Showing posts from April, 2017

1970 CT90 Headlight Switch Breakdown and Assembly

Image
I was going through and cleaning up the right lever lever assembly that retains the throttle grip and also the headlight switch and thought I would share a few shots of the detail parts of the headlight switch and how it is assembled. Here is an overall shot of all the components:

Cleaning CT90 Oil Passages

Image
If you do tear into your CT90's engine to replace a piston or do other work it is always a good idea to take a little more time and make sure any and all oil passages are clean and clear before reassembling the motor. An example would be a part like the overhead cam where each of the cam lobes and bearing journals have a hole where oil is provided to the surface while the engine is running.  Oil gets to each of these holes from a bore that starts at the left end of the cam shaft in the picture below and runs to just underneath the hole that is visible in the right most bearing journal. When you have a part like this out of the engine you really need to make sure that there is no dried up crud in the bore or in one of the oil supply holes and you should be able to look down the bore and see light coming through each of the oil supply holes.

Essential Oils for Working on Your CT90 Project

Image
The picture below are the three penetrating oils/lubricants that I keep handy when restoring an old CT90.

Helpful Link for Working on your CT90 Clutch

Image
Rebuilding Your CT90 Clutch I am getting ready to redo the clutch packs on two of my CT90's and this will be the first time I have ever dug into this part of the bike, so I started digging around on the web and came across this great post someone put together that I thought was really helpful so I thought I would pass on the link: http://hondatrailcts.yuku.com/topic/647#.WOmDJDllChA I hope this is of some help and good luck with your project. Adjusting Your CT90 Clutch To adjust  your clutch you need to loosen the 14 mm locknut and then turn the adjustment screw with a blade screwdriver counter clockwise until you feel resistance and then turn the adjustment screw 1/8 of a turn clockwise. While holding the adjustment screw in place with the blade screwdriver, tighten the 14 mm locknut and you should be good to go.

CT90 Rust Removal

Image
Something you'll never be able to avoid with a CT90 project is rust! These bike are all over 40 years old and most of the "project" CT90's you find usually have been setting on the side of someones house and have seen everything mother nature could throw at it. So with rust you need to just deal with it and the two approaches I use most often are soaking in white vinegar and electrolysis . There is a third method I have used to remove rust that is also a very viable method and that is using a toilet bowl cleaner called The Works , that I touch on at the end of the article. You can buy a variety of different commercial rust removers, but I wouldn't waste your money as both white vinegar and electrolysis are simple and very cheap approaches that will work just about as well as anything you'll buy at the store. If you only have light rust on some of your chrome parts you might look at another post I have made on various methods people has used to address t

CT90 Overhaul Process

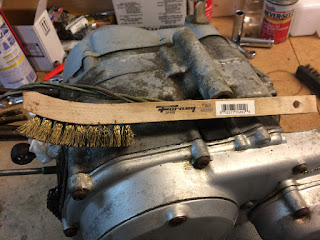
When I get an old beater CT90 that I decide I want to get back to where it is fully operational, I generally follow the process outlined below. The abbreviated version: 1. Clean it 2. Get it standing on the center stand 3. Drain the oil and flush once or twice as required 3. Get it rolling and work on the brakes while the wheels are off the bike 4. Work the wire bundles and electrical system. Get a battery and get everything working 5. Clean/rebuild carb, clean gas tank, get new fuel lines and a filter for each line. 6. Work the top end of the motor 7. Do any work to the lower half/transmission 8. Put everything back together and adjust valves, point gap, then timing. 9. Put in a new plug 10. Get it started and enjoy your rebuilt CT90!

Handy Tool - Brass Brush

Image
One tool that I really use a lot when I am going through an old CT90 is a good quality brass brush. Sometimes it is hard to find a decent quality brass brush as the lower cost ones from Harbor Freight have too few bristles and they are too soft and just bend over which makes the brush worthless. I have found the Forney #70491 brush in the picture below to be just about perfect. The bristles are made from a brass alloy that is stiff and hard enough that it holds its shape while in use, but the bristles are soft enough that they don't tend to scratch chrome unless you really go overboard. I pick these up at a True Value hardware store near me, but I am sure they are available online or at other hardware or welding supply stores.

Favorite Cleaners

Image
Whenever I am working on an old CT90 that I have just picked up, I initially spend most of my time just working to get everything clean so I know what I am working with.   My two favorite cleaners for this phase of the process and just in general are Simple Green and a hand cleaner like Fast Orange.

One of my favorite things - RuGLYDE

Image
One of the things that can make working on your CT90 that much easier is RuGLYDE. RuGLYDE is a rubber lubricant sold by Napa that comes in handy working with just about anything rubber on your bike.