Posts

Showing posts from October, 2017

Product Review - Huri Air Filter for the CT90

Image
I have two 1969 K1 CT90's that I am bring back to life and as I got to where they we running again, I ran into that unique problem that all the K1 owners run into and that is the rubber boot between the carb and air cleaner is unusable.  The only real alternative is to buy a new one at DrATV/Beatrice for $66.99 or try and find one on eBay at a reasonable price, which was unlikely. My goal with each of these K1's is to build a reliable runner to sell and not really restore them to their original condition, so I was flexible on what I could use for an air filter and I decided to go with a stubby style air filter. After a little searching on Amazon, I found this air filter by Huri that said it would fit on a CT90 and the price was right at $8.25 with free shipping using Prime.  In the end I am happy I purchased this air filter for my 1969 K1 CT90, but for other CT90 models I may have a different recommendation as I explain below. This is a picture of what I received after I
Honda CT90 Spark Advancer Assembly Build-Up

Image
When someone picks up their first CT90 (and they will soon find its hard to own just one...) and its a barn find that doesn't want to run, one of the things they tend to overlook in trying to get the bike running is the spark advancer.  On most older CT90's that haven't been run in a number of years, the spark advancer is usually frozen solid due to corrosion or dried grease and this prevents the bike from running well at anything other than idle. I was in the process of building up an engine for one of my project bikes and had to go through and clean up the spark advancer, so I thought I would share some detailed photos of the spark advancer assembly and the process for building it back up. While I don't plan on providing any details on how to get an old spark advancer assembly apart and clean, I will offer up that solvent, penetrating oil, and a lot of patience will eventually do the trick. Here is a shot of a clean and assembled CT90 spark advancer.  There are

Adjusting and Jetting a Honda CT90 Carburetor

Image
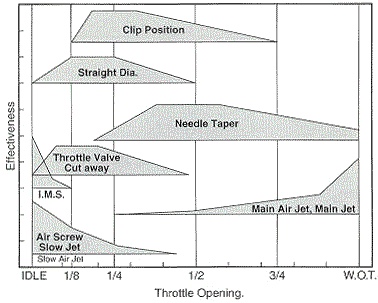
Recently I have had a couple of my CT90's start to give me some issues with how they were running and all the indications pointed at issues with the carb jetting and/or how it was adjusted.  All my CT90's were non running basket cases when I picked them up and I have very much enjoyed bringing them back to life.  Along the way, the process of getting these bikes back up and running involved digging through the pile of parts that I have to find something that might work, so each bike may not have the exact parts that the original model had, which may be part of my problem. Links to Related Posts: My Process to get a CT90 that won't Start to Start The Basic Sequence and Process to Set or Adjust your CT90 Timing Step by Step Instructions for the Reassembly of a basic Two Screw CT90 Carburetor Low Cost Cleaner for your CT90 Carburetor Jets and Screws CT90 Engine Assembly Honda CT200 Engine Reassembly To get to the bottom of my potential carb issues I decided to inves

Low Cost Cleaner for your CT90 Carburetor Jets and Screws

Image
If you do any work on your CT90 at some point or another I think everyone ends up rebuilding their carburetor and one of the most difficult task can be getting your jets clean, especially the idle or slow jet that has a very small orifice. In looking for an alternative to the standard carb cleaner like Berrymans B12 (which I think is about the best carb cleaner you can buy now days) I wanted to try something that hopefully would get down and clean the interior orifice of the jets which doesn't always seem to get clean with just standard carb cleaner, and even with Berrymans B12. I found this post on the web where someone used a toilet bowl cleaner called The Works.  I like The Works and have used it to help de-rust CT90 gas tanks in the past, so I thought I would give it a try. The Works is basically hydrochloric acid and Rodine (Rodine is an acid corrosion inhibitor) and this seemed like it should be effective on the varnish and the other crud that can build up in a carb.

Product Review - Small In-Line Fuel Filters

Image
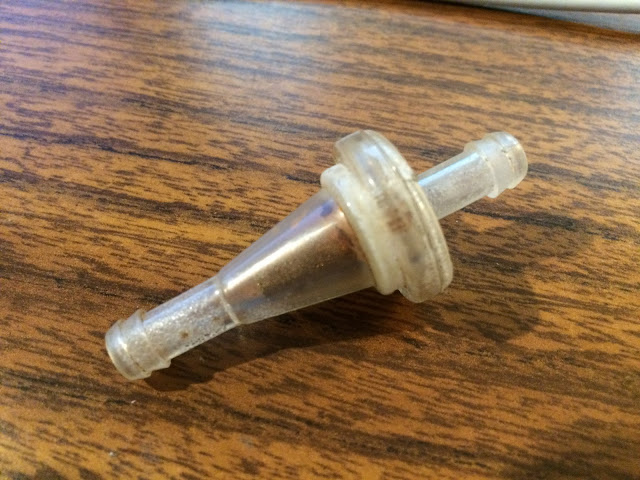
Most if not all the CT90's that I have picked up have been non-running project bikes that usually have been sitting out in the weather, which in almost every case has meant that the gas tank had some amount of rust.  While I think I do a pretty good job now that I have some experience under my belt at de-rusting tank, in the end there is always a little bit tucked away in some corner that I didn't get, so I always install an in-line filter on both the reserve and primary gas lines going to the CT90's carburetor. Given there is not a lot of space between where the gas lines exit the opening in the frame and the carburetor, I went looking for a nice small in-line filter. The first filter that I tried was a nice compact filter that I picked up off of Amazon.

Product Review - Harbor Freight Cen-Tech 7 Function Digital Multimeter

Image
One of the things I am known for is being a little cheap, so I don't have any problem taking advantage of the free items that Harbor Freight lists in their weekly adds.  One of the best free items they have is a low cost digital multimeter made by an outfit called Can-Tech. Here is a l ink to the Harbor Freight website where you can purchase the multimeter for around $4.49 if you don't take advantage of when then list it in their weekly add as a free item with any purchase. The multimeter comes with a basic set of instructions and a set of leads.

One of my favorite things - Dental Tools

Image
Over the years I have found that having a few dental tools around can really come in handy working on my CT90's either for cleaning little nooks and crannies or for trying to install or remove little tiny o-rings, or really for any one of a million other cases where something else just won't do.

Product Review - Volar Heavy Duty Drive Chain for the CT90

Image
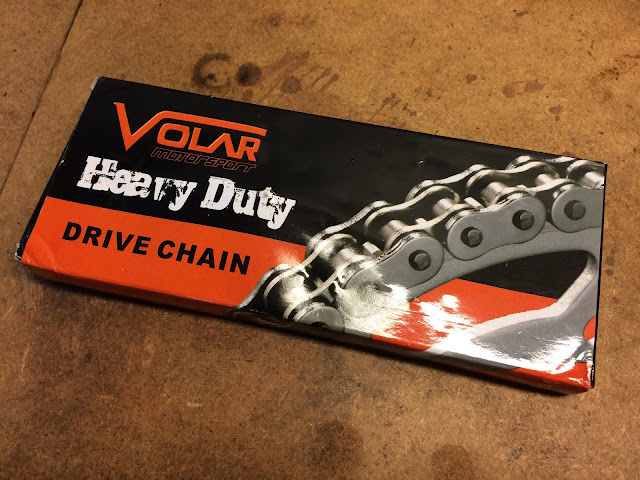
Volar Chain for Honda CT90 I recently purchased a new chain for a 1971 CT90 that I own off of eBay from a seller named d2moto. The chain is also available at Amazon at this link here. The chain was $18.99 and included free shipping. I haven't used a Volar chain before, so I thought I would give this a try. In the end I found the chain to be of good quality and from my perspective a good value for the price.

Building a basic Honda CT90 static timing light from a free Harbor Freight LED light

Image
If you ever plan on setting the timing on your CT90, one of the tools you will need is a static timing light. You can go out and buy a simple static timing lights as there are several available, but they are actually very easy to make yourself from just about any small hand held LED light that seem to be readily available everywhere. If you are going to adjust the timing on your Honda CT90 I made a post here with step by step instructions on the process you need to follow . If your in a part of the world that has Harbor Freight and you get the mailers from them on a regular basis, you'll already know that they offer a number of free items with a purchase, and one of those free items is a LED work light/flashlight that is Item # 60566 , which by the way also is a great light to modify into a static timing light for your CT90. I have a number of these lights in my shop as they are cheap/free, provide good light and also have a hook and magnet which come on handy when you'r

Product Review - CT90/Honda Tail Light Lens

Image
I recently purchased two Honda tail light lenses off of eBay from a seller named urbikeparts and the cost was $14.00 for each lens. That price also included two mounting screws and free shipping from China to my doorstep. The sellers store on eBay is Ur-Bike-Parts. Overall I am very happy with the purchase and plan on purchasing two more that I need for a couple of other builds I am doing.  It only took about two weeks from the time I ordered the lenses on eBay until they were delivered. Here is the link to the eBay page with the lens that is current as of 10/3/17. The two lenses were shipped in a plastic envelope and each lens was individually packed as shown in the picture below.