Making a CT90 or CT200 Down Tube Cover
In general, I have a hard time buying anything if I think I can make it myself and with the vinyl down tube covers found on the CT200's and early CT90's, I figured I would take a shot at making my own since they didn't look all that difficult to make.
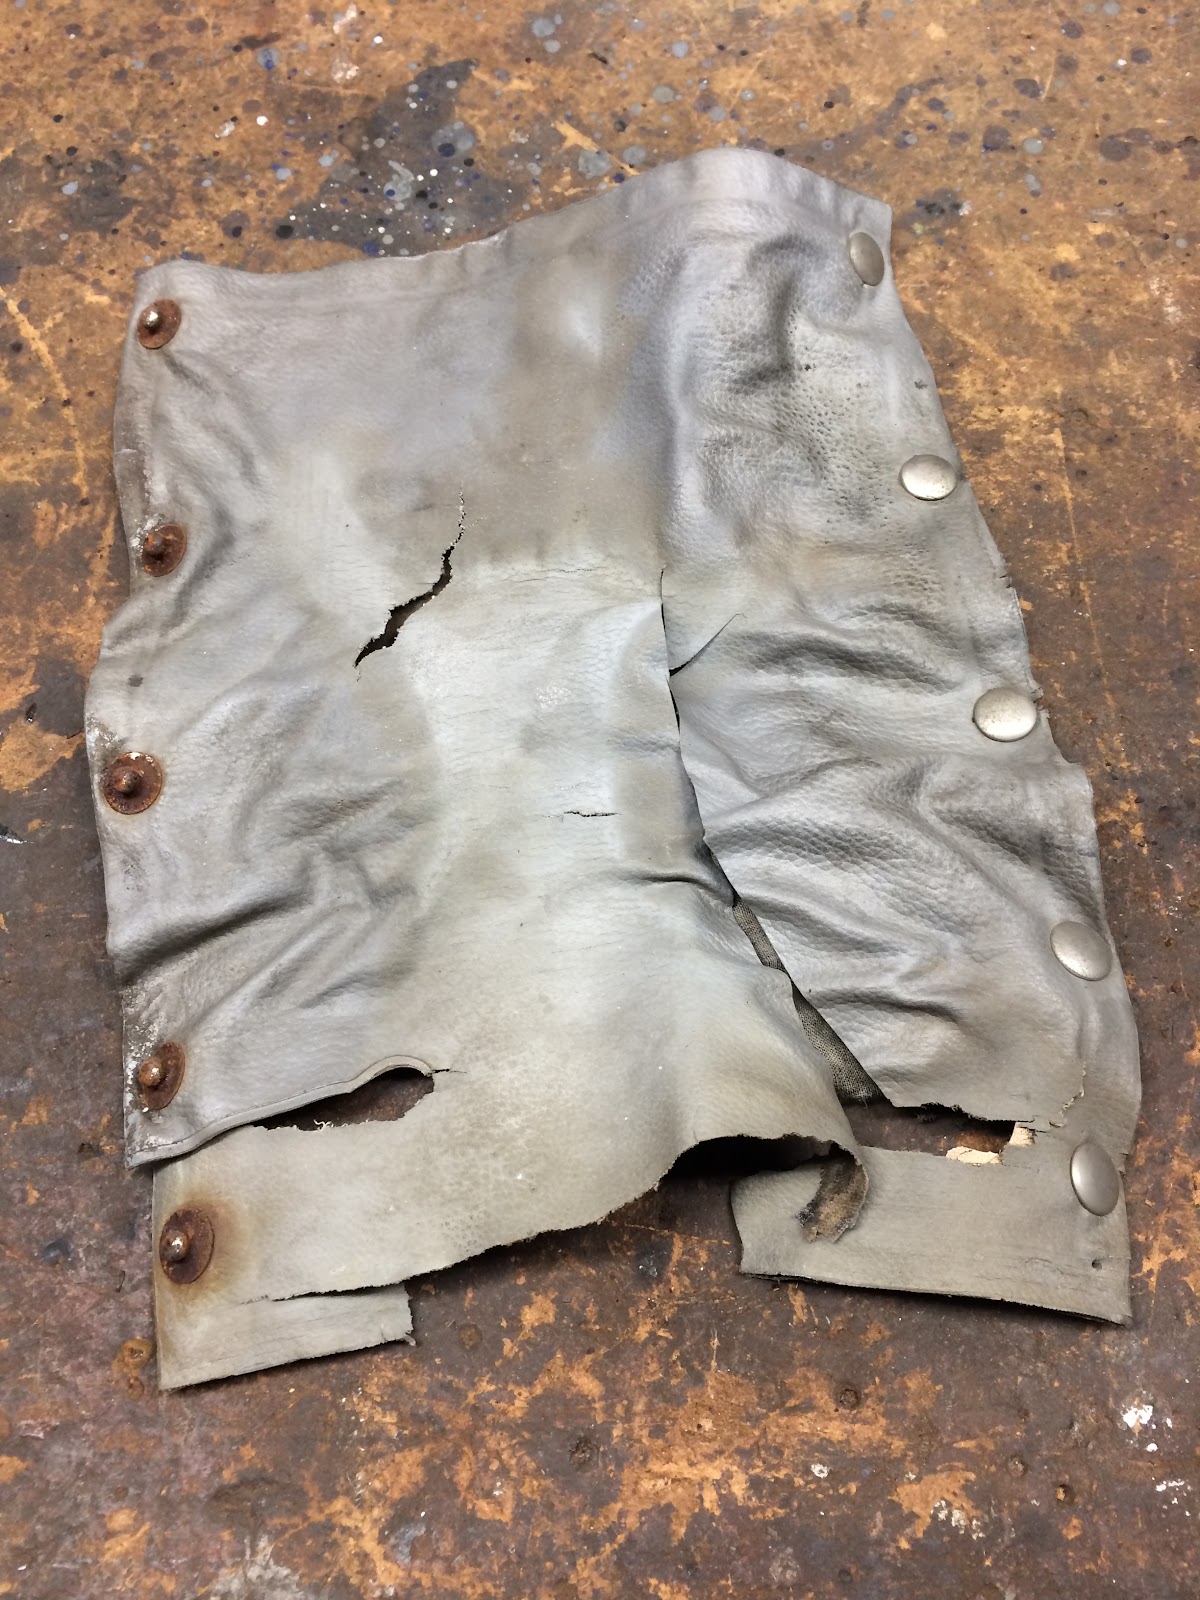
I did have the remnants of a down tube cover off of a CT200 I had owned in the past that was in pretty sad shape, but enough of it was there to get dimensions I could use to make a cover that would be functional and close to the original.
This is what the old original cover looked like on the outside and inside:
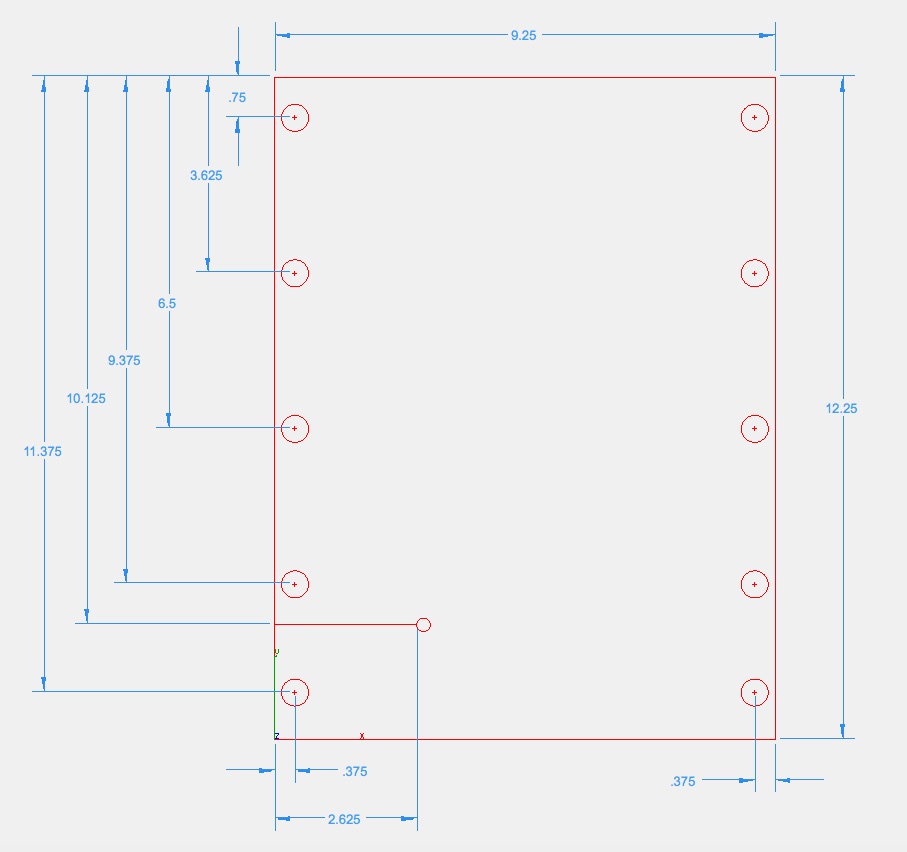
Here is the information on the finished outside dimensions and snap locations that I used for my version of the down tube cover. All dimensions are in inches.


I used a marine grade stainless steel snap that I ordered on Amazon and here is the link to those snaps. You also need a tool to set the snaps and here is the link to the tool I purchased off of Amazon for that purpose. When using the snap setting tool you really need to be on a hard surface like the concrete floor of your garage or you will end up damaging the snap. I already owned a tool to punch both the holes for the snaps and the relief hole at the end of the slit where one of the wire harnesses exits when the cover is installed, but there are a number of ways you can make these holes.
Here is a picture of the final cover installed on my 1968 CT90. I have made several of these covers and I am very happy with how they have turned out.
Helpful Links (Shop Manuals, Wire Diagram, Model Information, etc.)
Link to page with listing of CT90 parts available on Amazon
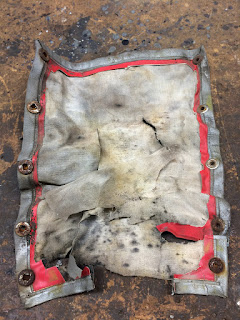
I did have the remnants of a down tube cover off of a CT200 I had owned in the past that was in pretty sad shape, but enough of it was there to get dimensions I could use to make a cover that would be functional and close to the original.
This is what the old original cover looked like on the outside and inside:
Here is the information on the finished outside dimensions and snap locations that I used for my version of the down tube cover. All dimensions are in inches.
To construct my cover I used two layers of vinyl. The outside piece had rough dimensions of 10 3/4 inches wide by 13 3/4 inches long. The inner piece was a shade under the finished dimensions of 9 1/4 inches wide and 12 1/4 inches long. In assembling the cover I would place the smaller piece back to back with the larger piece and center it on the larger piece. The next step is to cut the corners of the larger piece at 45 degrees so the cut just kisses the smaller piece. I then fold the larger piece over the smaller piece and sew on each of the four sides going around twice. Make sure to use a heaver weight polyester thread that will hold up being outdoors. Polyester thread is readily available at your local sewing store.
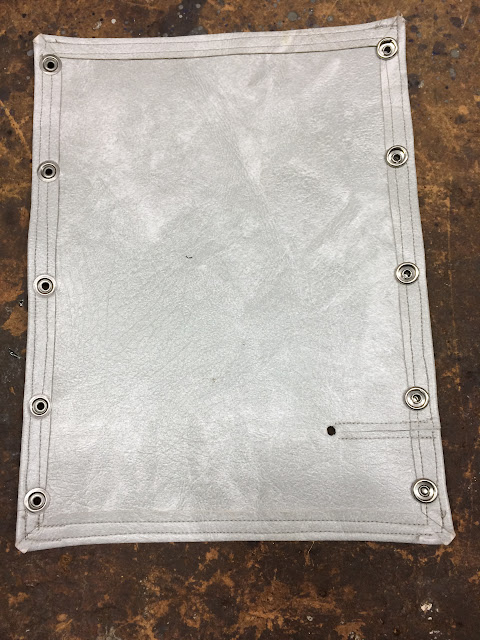
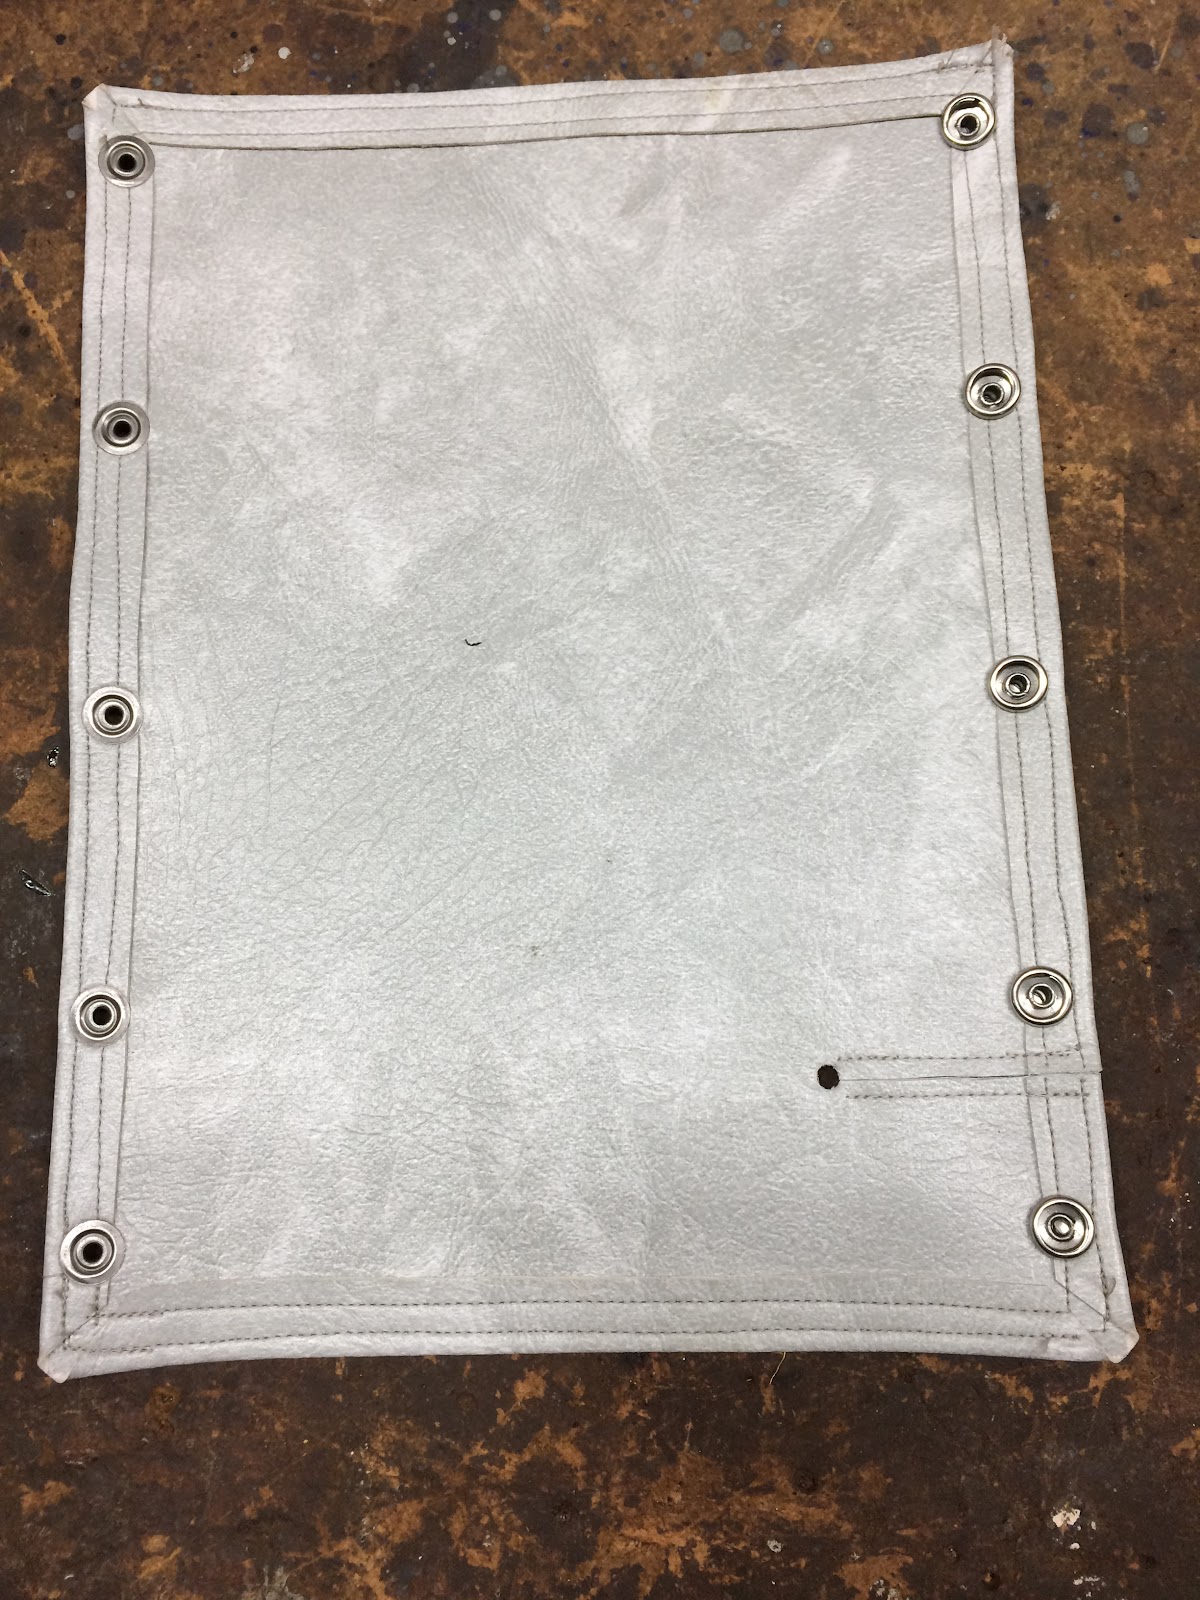
This is the inside surface of a finished cover with snaps installed and is what would be facing the down tube when the cover is installed.
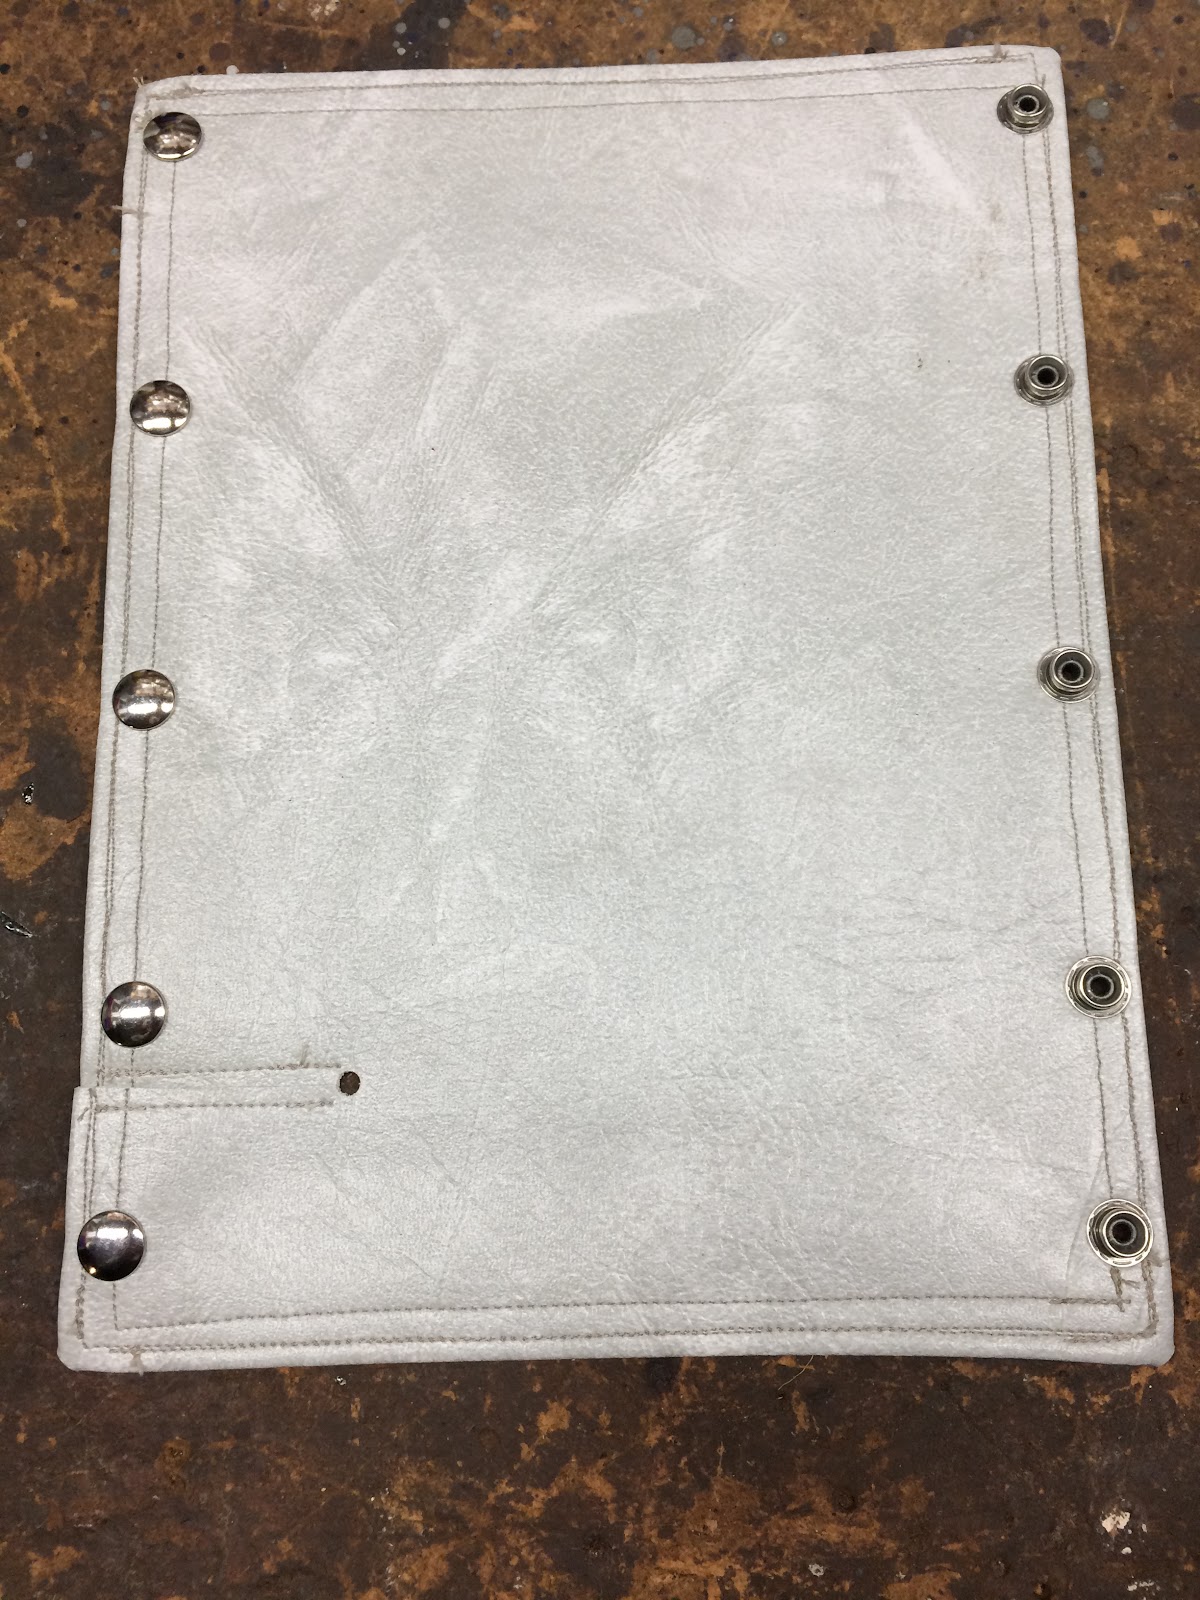
This is the outside surface of the finished cover.
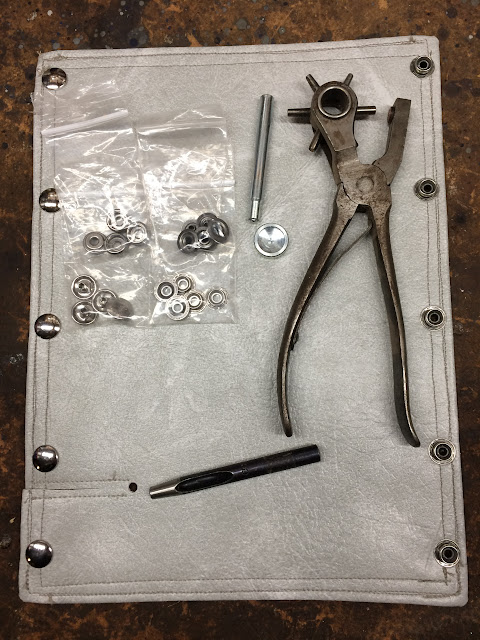
Here is a picture of the snaps and tools that I used to make the cover.

I used a marine grade stainless steel snap that I ordered on Amazon and here is the link to those snaps. You also need a tool to set the snaps and here is the link to the tool I purchased off of Amazon for that purpose. When using the snap setting tool you really need to be on a hard surface like the concrete floor of your garage or you will end up damaging the snap. I already owned a tool to punch both the holes for the snaps and the relief hole at the end of the slit where one of the wire harnesses exits when the cover is installed, but there are a number of ways you can make these holes.
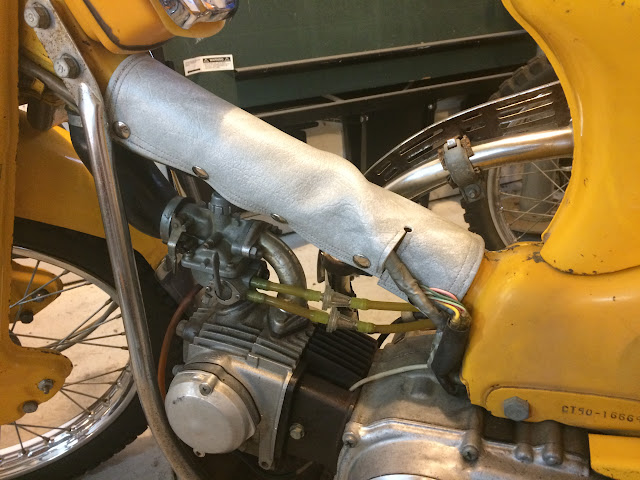
Here is a picture of the final cover installed on my 1968 CT90. I have made several of these covers and I am very happy with how they have turned out.

Helpful Links (Shop Manuals, Wire Diagram, Model Information, etc.)
Link to page with listing of CT90 parts available on Amazon
Nice work on the cover. It pays to be handy. Nothing wrong with a guy going to a craft/sewing store to pick up some supplies for a project.
ReplyDeleteVery well done.
ReplyDelete